Writing a Stored Proc in Neo4j for .NET Developers
I’m a .NET developer and I have been for about 13 years or so now, predominantly in C#, but I originally (in my university days) started off programming in Java. Now, I’ve not touched Java for roughly 13 years, and I’m pretty happy with that situation.
3 years(ish) ago I started using Neo4j – as you might notice from previous blog posts. The ‘j’ does indeed stand for Java and I had the feeling that some day – some dark day – I would have to flex those Java muscles again.
Turns out they had atrophy-ed to nothing.
Bum.
I’m guessing that I’m not the only .NET dev out there who fears the ‘j’ – so here’s a quick get-up-and-go guide to writing a Neo4j Stored Procedure.
We’re going to write a stored procedure to return a movie and all it’s actors from the example ‘movies’ database you can add to your instance by running ‘:play movies’ in the Neo4j Console.
The Tutorial
We’re going to go through the steps to create a super simple stored proc that just get’s the actors for a given movie.
Step 1. Install the JDK
I never thought I’d have to write that. Ho Hum, so I google for ‘Java SDK’ and pick the ‘Java SE Development Kit 8’ link (top one for me). Then download the appropriate SJDK for your environment, x64 or x86. Then install that bad boy. Oooh, Java is used on X Billion devices good to know!
Step 2. Install Gradle
Just go to https://gradle.org/install and follow the instructions – if you have ‘scoop’ or ‘chocolatey’ installed, then you can use them, I went manual install.
Side note 1 – WTF is Gradle?
Gradle is a build-automation system for Java, I guess a bit like MSBuild – with Nuget built in. As we’ll see a bit later on, you add the dependencies which are then pulled from Maven (the Java Nuget (I think)) – most of the posts you see online referring to how to create stored procs for Neo4j will use a Maven setup, but APOC (a large community driven set of stored procs) uses Gradle, and I reckon if they’re using Gradle, it’s probably better than Maven. Or it’s newer and shinier. Either way – I’m going Gradle.
Step 3. Choose your IDE – IntelliJ
To be honest, if you go with anything other than IntelliJ IDEA – you may as well stop reading – as this is all written from an IntelliJ point of view. I’m using the Ultimate edition, but I have no doubt this will be pretty much the same on the Community (free!) version.
Download and install.
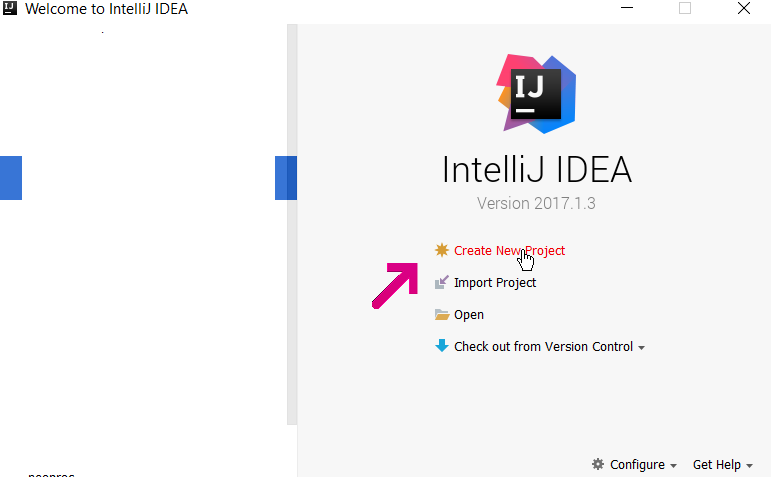
Step 4. Start IntelliJ

It does have a nicer splash screen than Visual Studio – and JetBrains write Resharper – so hopefully the changeover isn’t as jarring (ha!) as it could be.
Step 5. New Project!

But what new project?

What we’re going to go for is a ‘Gradle’ project, choosing Java and using the 1.8 SDK:

Step 6. GroupId and ArtifactId
Pressing ‘next’ gets us to a window allowing us to set the groupId and artifactId of our project.
Step 7…
Wait what? GroupId? ArtifactId? What on earth are they??? Shouldn’t there just be ‘Name’?
OK, you can think of these as kind of like a namespace and a dll (jar) name.
GroupId – a name to uniquely identify your project across all projects. Typically (it seems) this usually follows the convention of ‘org.<companyName>.<projectName>’ so, (going all MS) I might have: ‘org.contoso.movies’.
ArtifactId – Basically the name of the JAR file that is created, minus any versioning information. Lowercase only folks – cos it’s Java, and I guess to optimise keyboard usage they opted to shun the shift key.

As you can see, I’ve got a company name of ‘cskardon’ and a JAR name of ‘movies-procs’. I’ve left the Version as it was. Just because. Hit Next, next.
Step 7. More settings!
Don’t worry we’re nearly there,
I turned on ‘Auto-import’ and ‘Create directories for empty content roots automatically’. I’m using the default gradle wrapper – this basically (as far as I know) puts a copy of gradle into your folder so you can run ‘gradle.bat’ from the command prompt and have it do all the things. Either way, it does mean you don’t have to install gradle if you’re just using the code.
You will need to make sure the Gradle JVM is set to ‘1.8’ (see the picture below) it won’t work with the JAVA_HOME option.

Step 8. Locations!
Finally! Locations! Name wise – we’ll stick with what we selected for the artifactId in step 6, this makes life easier – and location wise – go for wherever you like – it’s your computer after all.

Note, we now have a ‘finish’ button – no more ‘next’ HUZZAH!
Step 9. Expand and config files
First off, let’s expand the ‘movies-procs’ node:

Now, double click on the ‘build.gradle’ file. We need to add some things here to get access to libraries for Neo4j. First up is a ‘project.ext’ element:
project.ext {
    neo4jVersion = "3.2.0"
}
This needs to be below the sourceCompatibility element, and above the repositories element. Speaking of which, we need some more repositories, so set the repositories element to:
repositories {
mavenLocal()
maven { url "https://m2.neo4j.org/content/repositories/snapshots" }
mavenCentral()
maven { url "http://oss.sonatype.org/content/repositories/snapshots/" }
}
Now we need to change the dependencies so we can use all the goodies.
dependencies {
compile group: 'commons-codec', name: 'commons-codec', version:'1.9'

compile 'com.jayway.jsonpath:json-path:2.2.0'

compileOnly group: 'net.biville.florent', name: 'neo4j-sproc-compiler', version:'1.2'

testCompile group: 'junit', name: 'junit', version:'4.12'

testCompile group: 'org.hamcrest', name: 'hamcrest-library', version:'1.3'

testCompile group: 'org.apache.derby', name: 'derby', version:'10.12.1.1'

testCompile group: 'org.neo4j', name: 'neo4j-enterprise', version:neo4jVersion

testCompile group: 'org.neo4j', name: 'neo4j-kernel', version:neo4jVersion, classifier: "tests"
testCompile group: 'org.neo4j', name: 'neo4j-io', version:neo4jVersion, classifier: "tests"
compileOnly(group: 'org.neo4j', name: 'neo4j', version:neo4jVersion)
compileOnly(group: 'org.neo4j', name: 'neo4j-enterprise', version:neo4jVersion)

compileOnly(group: 'org.codehaus.jackson', name: 'jackson-mapper-asl', version:'1.9.7')
testCompile(group: 'org.codehaus.jackson', name: 'jackson-mapper-asl', version:'1.9.7')

compileOnly(group: 'org.ow2.asm', name: 'asm', version:'5.0.2')

compile group: 'com.github.javafaker', name: 'javafaker', version:'0.10'

compile group: 'org.apache.commons', name: 'commons-math3', version: '3.6.1'
}
By the way – I’d like to point out I have largely got this from the APOC library, so it’s probably bringing in too much, and is probably overkill, but later on when you need something obscure, it’s probably already there. So… Win!
Step 10. Package 1
10 steps to get to programming, but on the plus side – each stored proc you add to this project doesn’t need the setup, and it’s a one-off for each project. Anyhews.
So we’re going to add a package, which is a namespace. In this case we’re going to add one called ‘common’:
Expand the ‘src/main’ folders – and right click on the ‘java’ folder, then add –> new –> Package

Now you have the package there:

Step 11. A class
Now time to add a Java file – called ‘MapResult’ – this is entirely taken from APOC.

Type is in this case a class:

Highlight everything in the class that is created, and paste the below into it:
package common;

import java.util.Collections;

import java.util.Map;

public class MapResult {

private static final MapResult EMPTY = new MapResult(Collections.<String, Object>emptyMap());
public final Map<String, Object> value;

public static MapResult empty() {

return EMPTY;
}

public MapResult(Map<String, Object> value) {

this.value = value;
}
}
This allows us to map this result of our query.
Step 12. Package 2
OK, now we’re going to add another package to the ‘java’ folder, this time called ‘movie’, and a class within that called ‘ActorProcedures’ – not necessarily the best named class :/

Step 13. Code!
I’m just going to ask you to paste the below into your code window, and we’ll go over it in a minute or two:
package movie;

import common.MapResult;
import org.neo4j.procedure.Context;
import org.neo4j.procedure.Name;
import org.neo4j.procedure.Procedure;

import java.util.Collection;
import java.util.HashMap;
import java.util.Map;
import java.util.stream.Collectors;
import java.util.stream.Stream;

import static java.lang.String.format;
import static java.lang.String.join;

public class ActorProcedures {
@Context
public org.neo4j.graphdb.GraphDatabaseService _db;

public static String withParamMapping(String fragment, Collection keys) {
if (keys.isEmpty()) return fragment;
String declaration = " WITH " + join(", ", keys.stream().map(s -> format(" {`%s`} as `%s` ", s, s)).collect(Collectors.toList()));
return declaration + fragment;
}

@Procedure
public Stream getActors(@Name("title") String title) {

Map<String, Object> params = new HashMap<String, Object>();
params.put("titleParam", title);
return _db.execute(withParamMapping("MATCH (m:Movie)<-[:ACTED_IN]-(a:Person) WHERE m.title = {titleParam} RETURN a", params.keySet()), params).stream().map(MapResult::new);
}
}
Step 14. Build
Yes – I know we’ve eschewed tests, we’ll come to those later, for now we just want to do the standard ‘build’ – because we’re using gradle. we’re going use IntelliJ to help us run the build, first go to ‘View’ then ‘Tool Windows’ and select ‘Gradle’

In the window the pops up, expand the ‘Tasks’ and then ‘build’ collapsed elements, and double click on ‘build’:

You should get a ‘Run’ window popping up at the bottom of the screen, looking a bit like this:

You should also now have a ‘build’ folder in your project window, with a ‘libs’ folder inside, and hopefully inside that – the .jar file

Step 15. Manual Testing
I’m going to cover unit testing the procedure in another post, to try to limit the size of this one, but obviously now we have a .jar, we want to put that into our DB.
Right-click on the .jar and select ‘Show in Explorer’

Copy that .JAR file and place into the ‘plugins’ directory of your version of Neo4j. Now, if you’ve used the ‘zip’ version – it’s just in the root already there, and if you’re using the installer version – you’ll need to create a ‘plugins’ folder in the location listed in the application:

So copy the location and open it in explorer:

New folder called plugins.
Now paste the .Jar file into the plugins folder and stop (if you need to) Neo4j, then start it again to load it.
Go to the neo4j browser and login if you need to.
We’re now going to run ‘call dbms.procedures’

We get a list of the procs in the DB, so far so good – now it’s time to scroll on down the list…

Awesomeballs!
Now, let’s call that bad boy. BTW – I’m assuming you have the movies DB installed – if not, run
:play movies
now and get it all there. Done? Good.
To call our proc, we run:
call movie.getActors(“Top Gun”)
![]()
Which gets us results:

Now, that seems tested and working. But we probably want to start getting some unit tests in there asap, so I’ll cover that next.